We are celebrating Ashley's Birthday! How fun! Ashley was even able to score a sponsor with "Blog Candy" for one lucky winner!
Blog candy is sponsored by: 3 Girl Jam
"Bundles 1-6" which consists of 48 total yards of ribbon in 12 colors, a $24.99 retail value.
Must "like" their Facebook page- https://www.facebook.com/pages/3-Girl-JAM/129045323859706
Follow the 3 Girl Jam Blog- 3 Girl JAM
Paper Piecings By Nikki-$25 gift certificate
http://www.paperpiecingsbynikki.com/
Must "like" her Facebook page- https://www.facebook.com/pages/Paper-Piecings-by-Nikki/210135505721726
Follow her blog- http://www.paperpiecingsbynikki.blogspot.com/
Decade Of Scrap-4 valentines digis
http://zibbet.com/beautydecade
Must "like" her Facebook page- https://www.facebook.com/DecadeofScrap
Follow her blog-http://decadeofscrap.blogspot.com/
MB's Treasurista-$10 gift certificate
http://www.zibbet.com/
Must "like" their Facebook page-https://www.facebook.com/https://facebook.com/pages/MBs-Treasurista/167767899982066
Follow MB's Treasurista Blog-http://
Even if you are not the lucky winner of their candy, go check them out to see all the cool items they carry and for more inspiring project of theirs.
Today, we are creating a project with the theme "Black, White & A Splash of Color". Below is my project. I was inspired by the song "Jar full of Hearts" by The Band Perry. I had an empty jar sitting on my desk I just had no idea what to do with, but knew I needed to keep it to craft with. I am glad I did. Enjoy the project.
Blog candy is sponsored by: 3 Girl Jam
"Bundles 1-6" which consists of 48 total yards of ribbon in 12 colors, a $24.99 retail value.
Must "like" their Facebook page- https://www.facebook.com/pages/3-Girl-JAM/129045323859706
Follow the 3 Girl Jam Blog- 3 Girl JAM
Paper Piecings By Nikki-$25 gift certificate
http://www.paperpiecingsbynikki.com/
Must "like" her Facebook page- https://www.facebook.com/pages/Paper-Piecings-by-Nikki/210135505721726
Follow her blog- http://www.paperpiecingsbynikki.blogspot.com/
Decade Of Scrap-4 valentines digis
http://zibbet.com/beautydecade
Must "like" her Facebook page- https://www.facebook.com/DecadeofScrap
Follow her blog-http://decadeofscrap.blogspot.com/
MB's Treasurista-$10 gift certificate
http://www.zibbet.com/
Must "like" their Facebook page-https://www.facebook.com/https://facebook.com/pages/MBs-Treasurista/167767899982066
Follow MB's Treasurista Blog-http://
Even if you are not the lucky winner of their candy, go check them out to see all the cool items they carry and for more inspiring project of theirs.
Today, we are creating a project with the theme "Black, White & A Splash of Color". Below is my project. I was inspired by the song "Jar full of Hearts" by The Band Perry. I had an empty jar sitting on my desk I just had no idea what to do with, but knew I needed to keep it to craft with. I am glad I did. Enjoy the project.
Here is a picture of all the items I used to create this "jar full of hearts", minus the adhesives because I didn't know exactly which ones I would be using.
Ingredients List:
- Scissors
- Any size jar desired, or that you have on hand
- Xmas Red Stickles
- 36" of red ribbon
- Black and white card stock sheets from Reflections
- "Scarlet Red #118" PITT artist pen big brush, Faber-Castell
- Studio G stamp set (VS4911 Series 61)
- Heart stamp,from Close to My Heart, the Celebration set
- Inkpads used: "Moonlight White" by Tsukineko/Brilliance; Stampin' Ups "Real Red"; and Stampology's "Onyx" Clear stamp ink pad

First, I stamped hearts onto the right edge of the black card stock. Then, folding the card stock to the left of the hearts, I cut them so that they would be mini- card hearts. See image below. Repeat until you get enough hearts cut out of each color of card stock. Don't forget to do ONE heart in a different color!

Here are all the hearts after I stamped & cut them all. Notice, I made sure to add 1 red one, hubby's favorite color (it's my splash of color). At this time, I added stickles to the red heart & let it dry, before placing in the jar. Next, you can add notes like: hugs, kisses, I love you, massage..... Just little love notes that the recipient can pick and maybe get something from you. Not sure if you can really tell, but I cut most of the hearts with the fold at the top, these will flip up instead of open like a book. Next, fill your jar with the hearts dropping them in one by one so they won't catch on each other. Once you get it pretty full, start placing hearts in the jar so that they are facing outwards. Ensure that your special heart (in my case the red one) is facing outwards in the front of your jar for presentation.

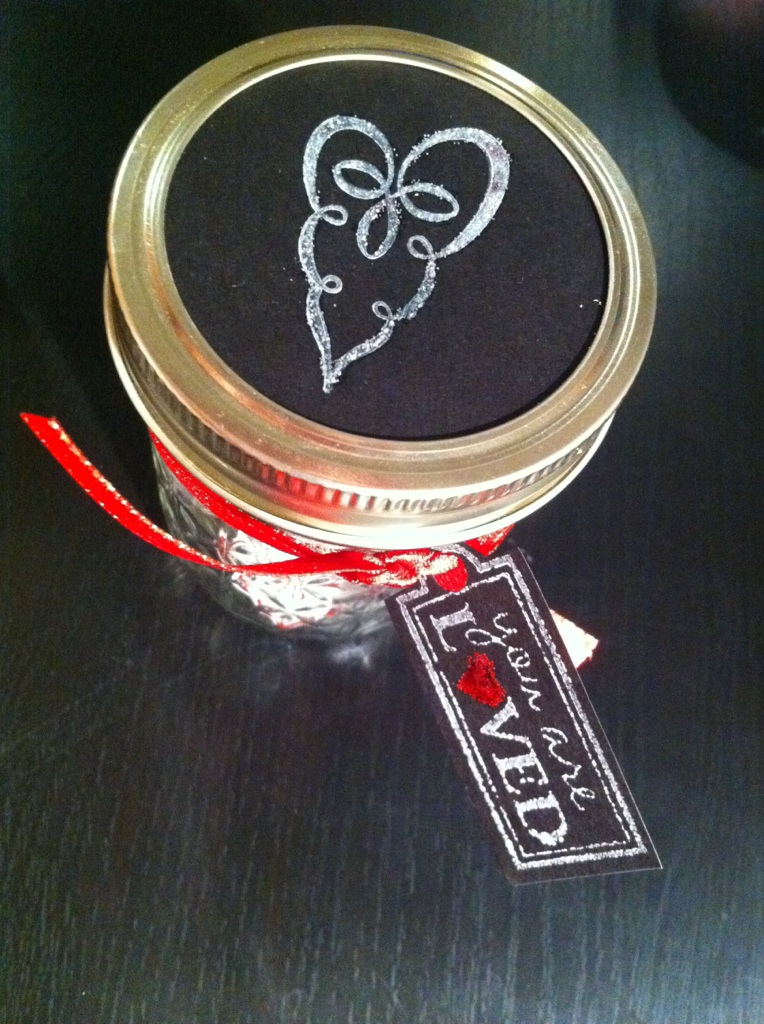
Using the lid for reference, trace it to cover the top. Cut it just a little smaller than the top (my jar is a canning jar) because it will be smooshed between the top & the ring and you don't want it bulking up. I stamped a white heart on my cover and stickled it with "Frosted Lace". Next, stamp the "you are loved" sentiment in black but redo the heart with red (here's where I used the scarlet red pen brush and then stickled the heart). Cut out & hole punch the sentiment and attach it to the jar with your red ribbon. All done!
Here is the finished project.


Happy Crafting!
Your next stop is over to Liz to see her fantastic project.
Here is the blog line-up just in case you missed someone...
Zenita - http://scrappinwithz.blogspot.com
Carla - http://racincrafts.blogspot.com/
Teresa - http://scrappintplace.blogspot.com
Jearise- http://lorbysworld.blogspot.com


